

To hide a plumbing access panel, use a tile-integrated solution designed to receive the same finishing tile as the surrounding surface. A conventional painted or metal hatch can stand out and disrupt the look of a finished tiled wall, while hidden access panels for tiled walls blend into the surface while still providing access to plumbing, electrical components, and other service points.
At Edplit, we plan a tileable access panel as part of the tile layout rather than adding it after the wall is finished. And now that you know how to hide electrical socket behind tile and how to install a hidden flush button, let's look at how to integrate an access panel into a tiled wall while keeping both service access and a clean, uncluttered appearance.
How to Hide an Access Panel Behind Tile
In this part, let’s go through the whole process of how to hide a plumbing access panel, from choosing the panel to checking the finished result.
1. Choose a Tile-Integrated Access Panel
To hide an access hatch in a tiled wall, choose a panel designed to receive the same finishing tile as the surrounding surface. A traditional metal or painted access hatch remains visible because its door has a different material and finish from the wall. With a tiled access panel from Edplit, the finishing tile becomes part of the door, allowing you to match the panel to the surrounding surface instead of trying to disguise a visible hatch. At the same time, the space behind the panel remains accessible whenever inspection or maintenance is required.

2. Plan the Panel Location Before Tiling
Decide where the inspection hatch will go before you start tiling. Plan it as part of the overall tile layout so the panel works with the size and pattern of the tiles rather than disrupting the finished wall. Before installation, consider the following:
- Access to plumbing or electrical components. Make sure the panel provides easy access to everything that may need to be inspected, serviced, or repaired.
- Opening direction and access. Check that nothing blocks the door from opening fully.
- Space in front of the panel. Leave enough clear space to use the hatch comfortably.
- Grout lines. Plan the wall opening so its position works with the surrounding grout lines.
- Tile size. Check that the chosen tile is suitable for the panel dimensions and opening.
- Tile pattern. Position the panel so it doesn’t unnecessarily interrupt the tile pattern.
- Visual integration. Make sure the panel fits smoothly into the surrounding tiled surface.
To hide an access panel so it looks visually integrated, take care of these details before you start tiling. This helps maintain a clean and continuous wall surface.

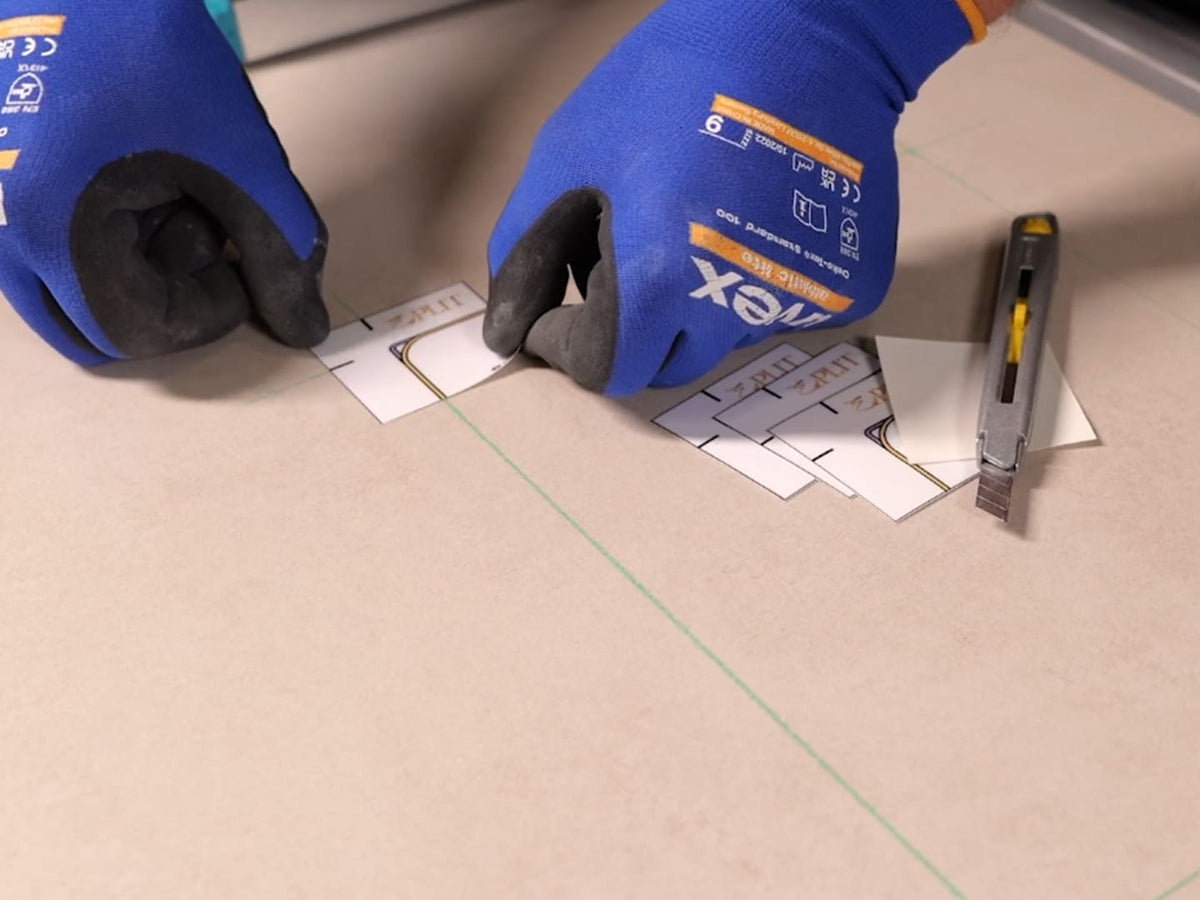
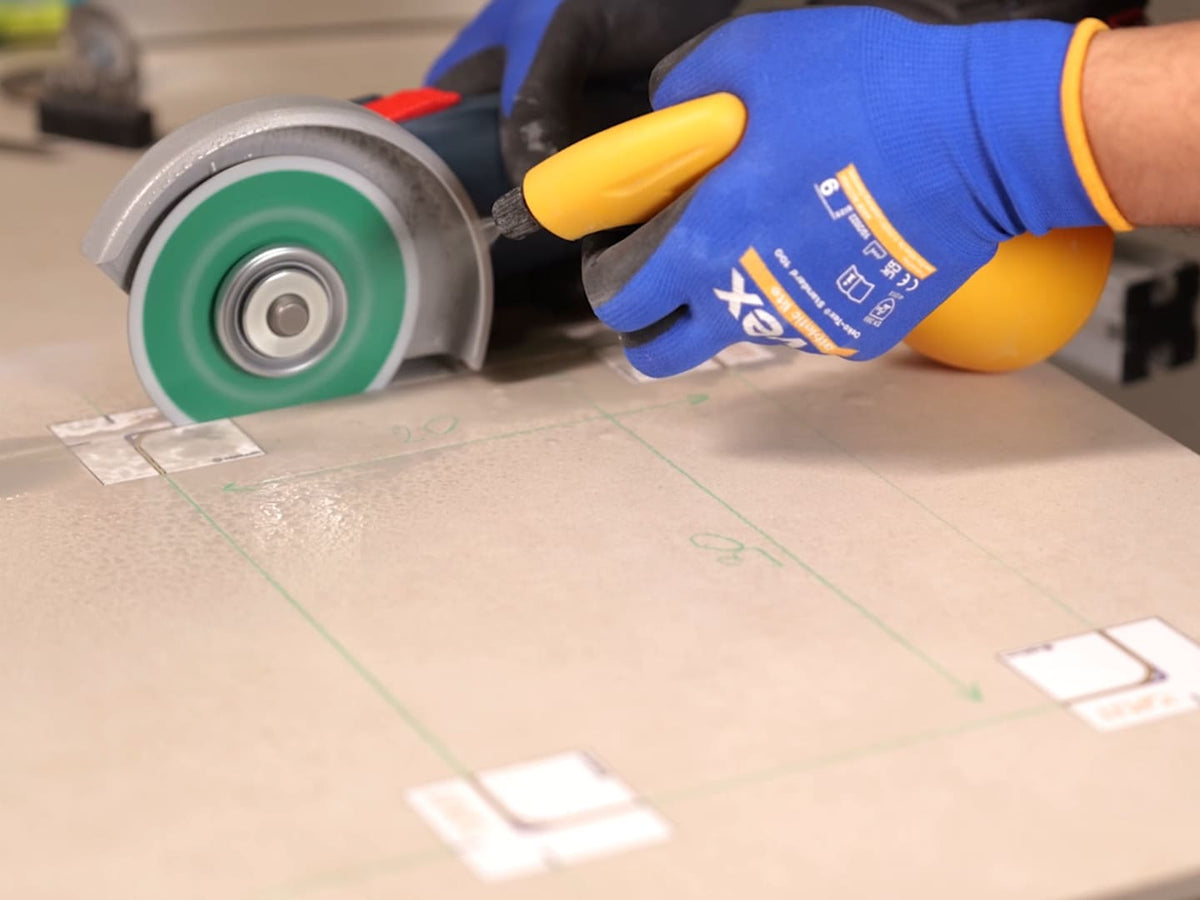
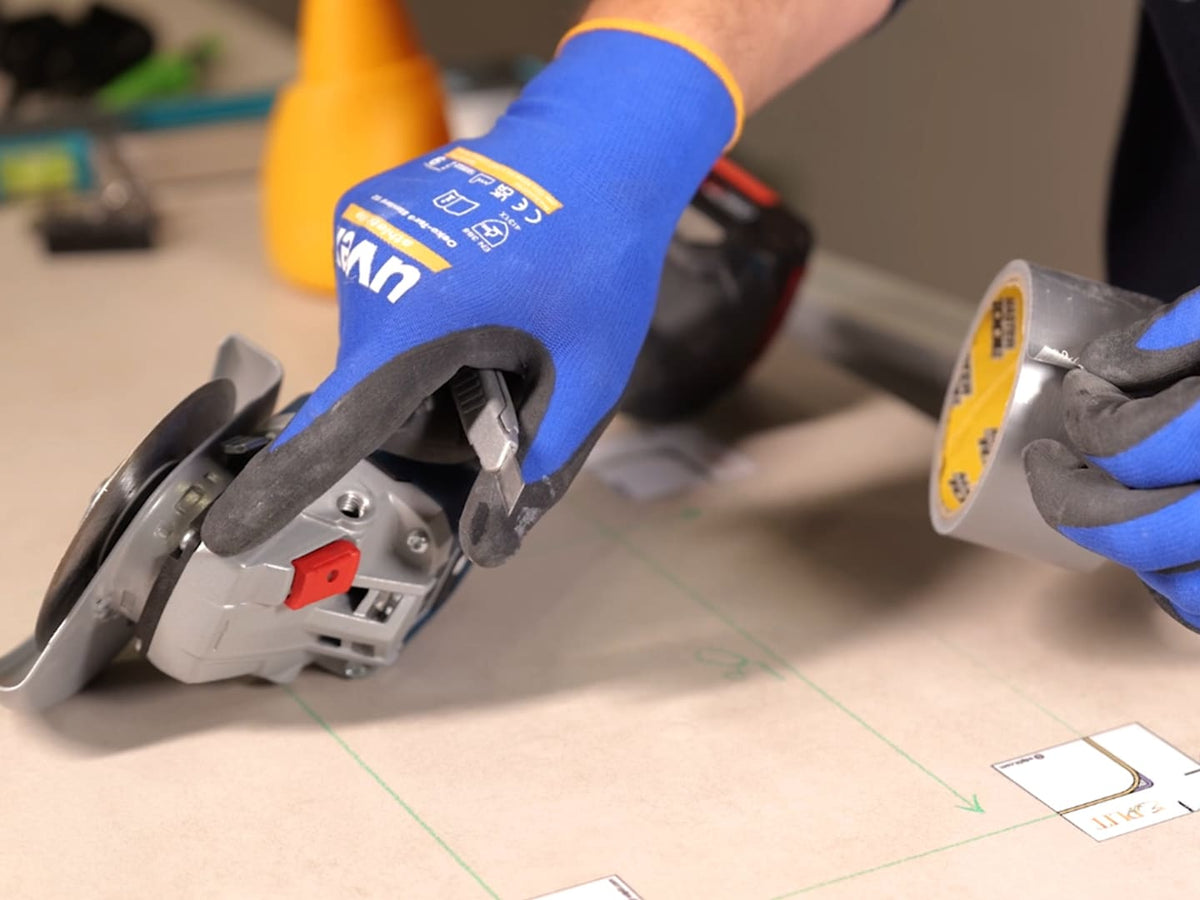
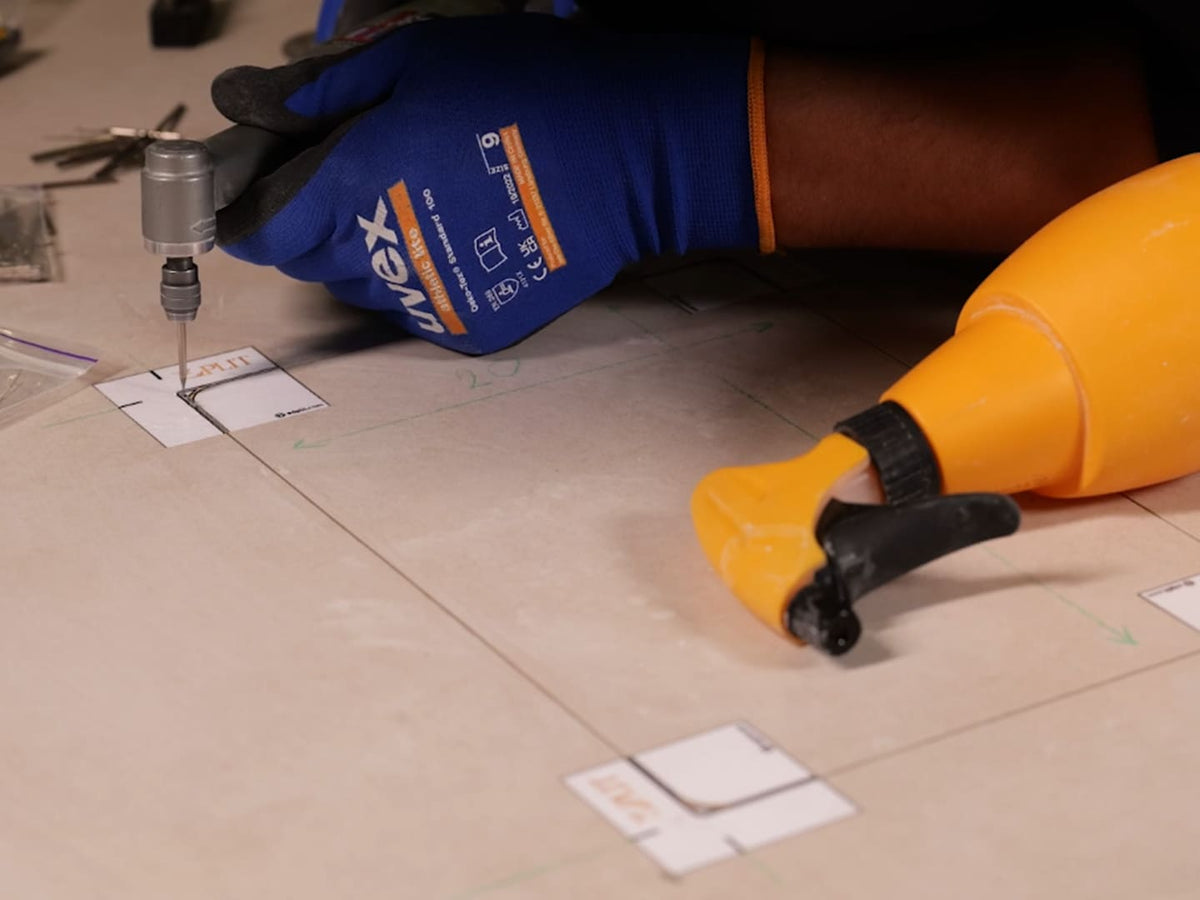
3. Cut and Prepare the Tile
Once you have planned the panel location and tile layout, prepare the finishing tile for installation. The main steps are:
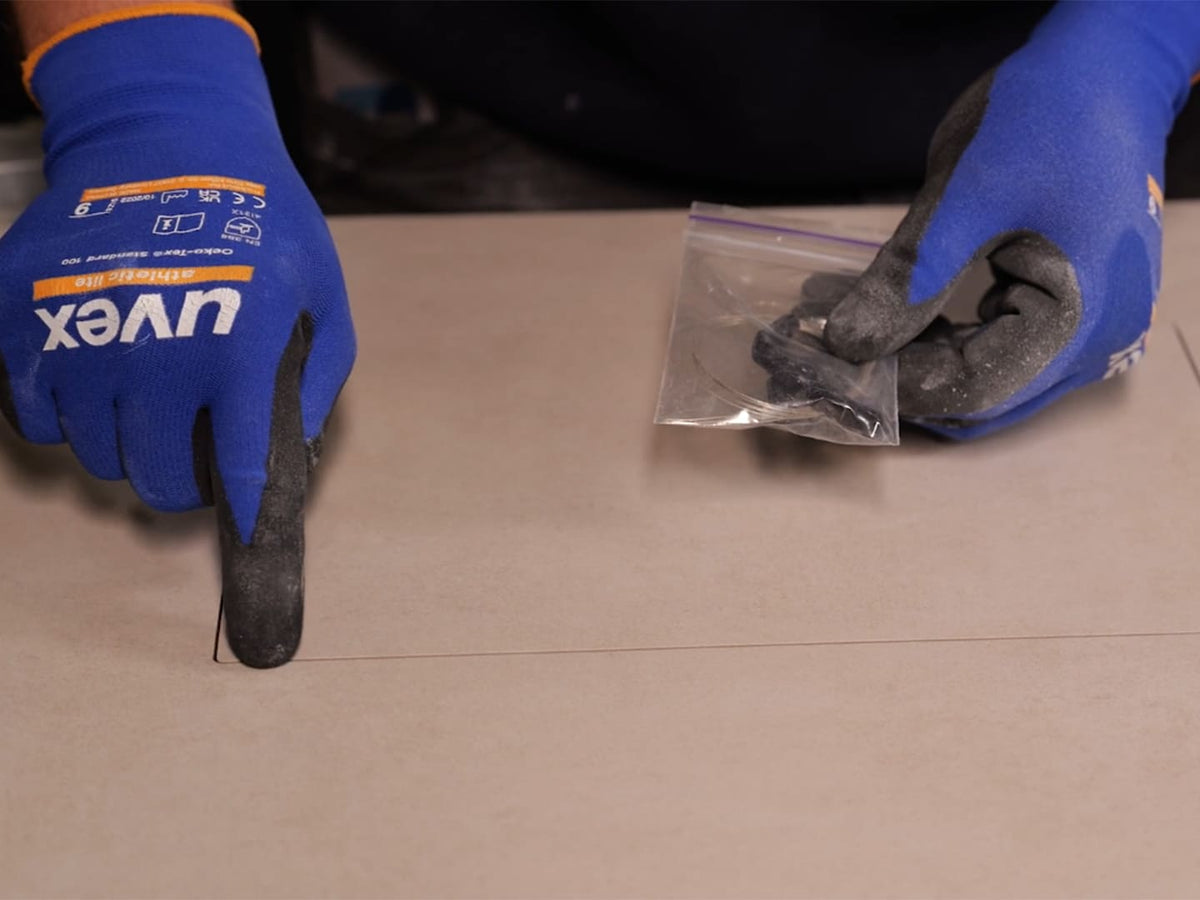
- Mark the hatch position on the tile.
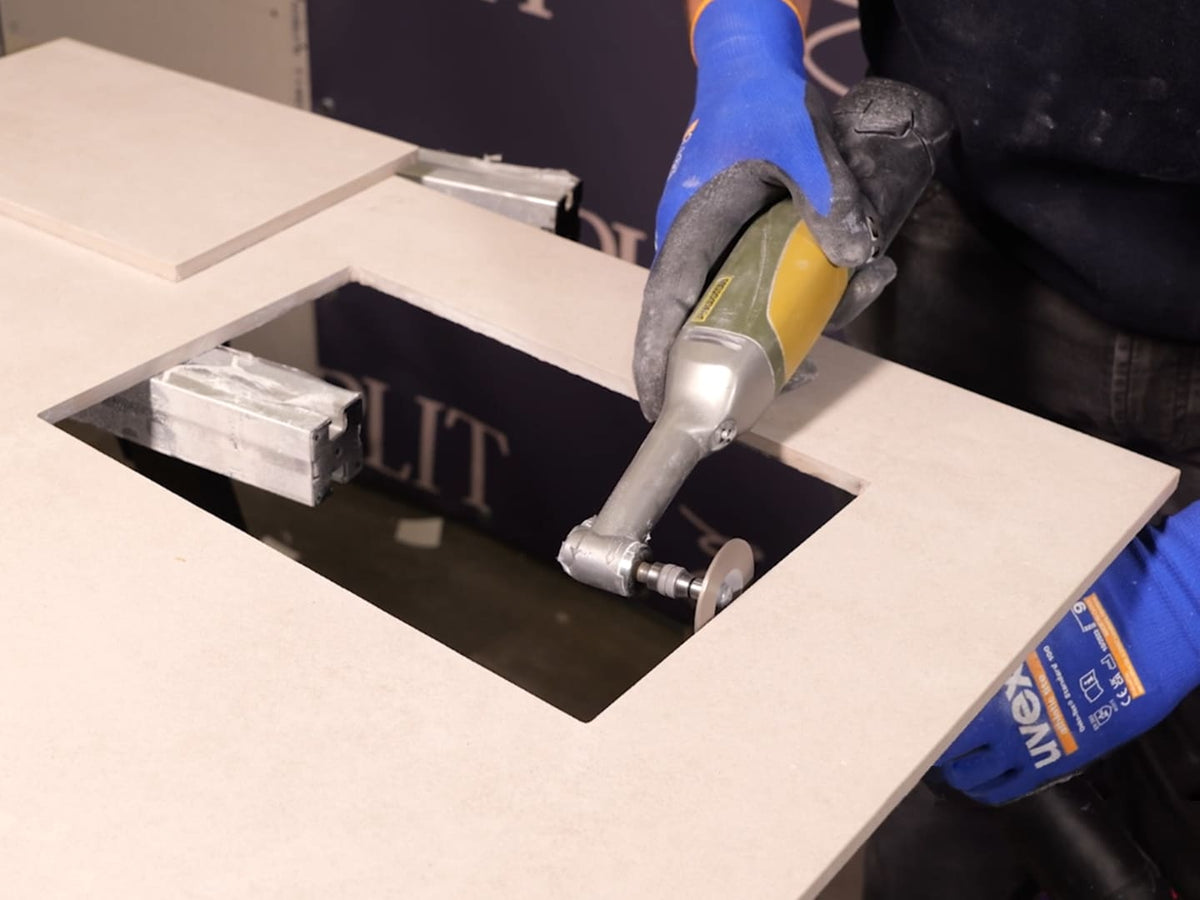
- Cut the tile to create the required hatch opening.
- Leave a narrow, even gap around the perimeter.
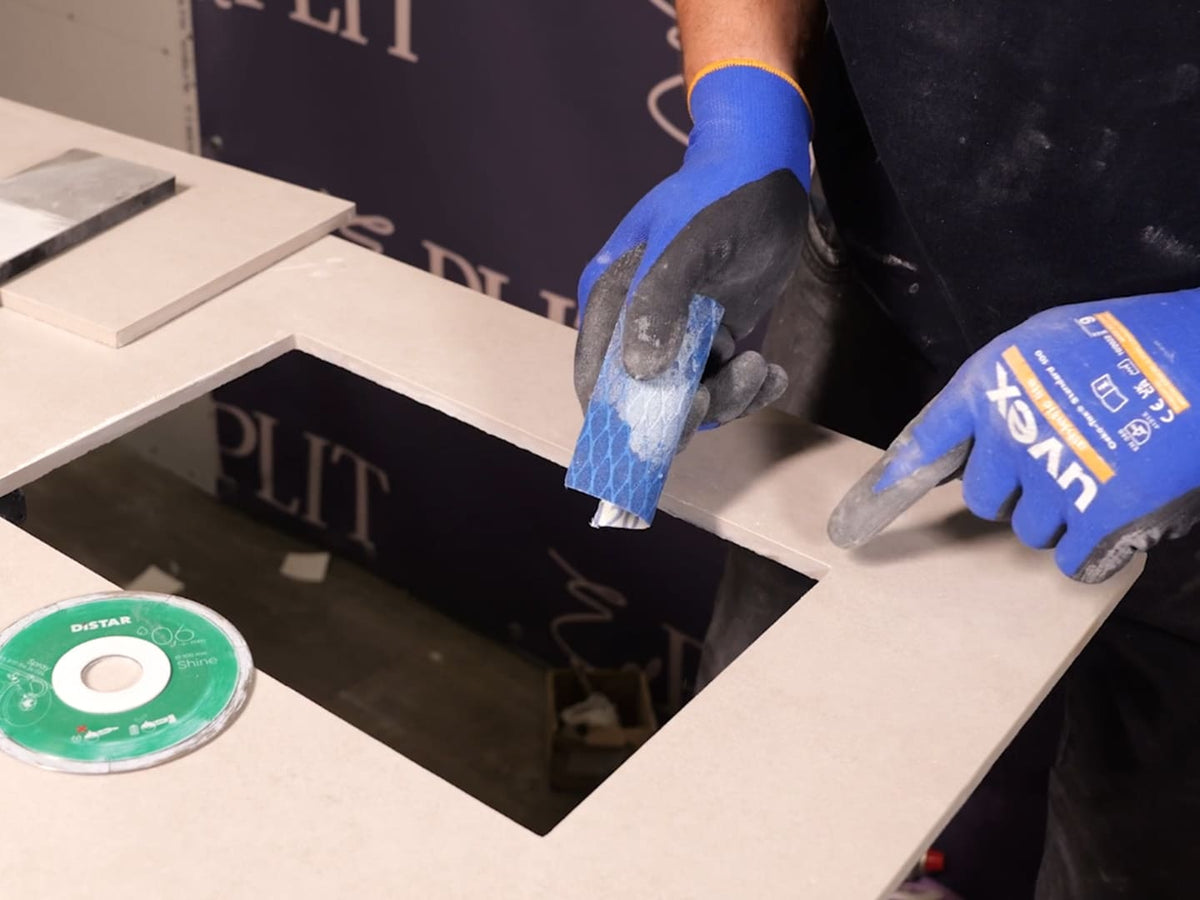
- Carefully finish and sand the cut edges, including the rounded corners.
- After sanding, use a diamond cutting wire to cut small rounded edges.
- Sand the inner edges, using a more delicate tool.
- Use a diamond sanding pad to fine-tune the edges. Sand the rounded edges with sandpaper.
Always cut accurately. The tile will become part of the access hatch, so precision is essential. Uneven edges or an inconsistent gap can make the finished tiled access door more noticeable. For a visual example, see the Edplit access panel installation process.
4. Install and Adjust the Access Hatch
Now that the tile is prepared, move on to installing and adjusting the access hatch:
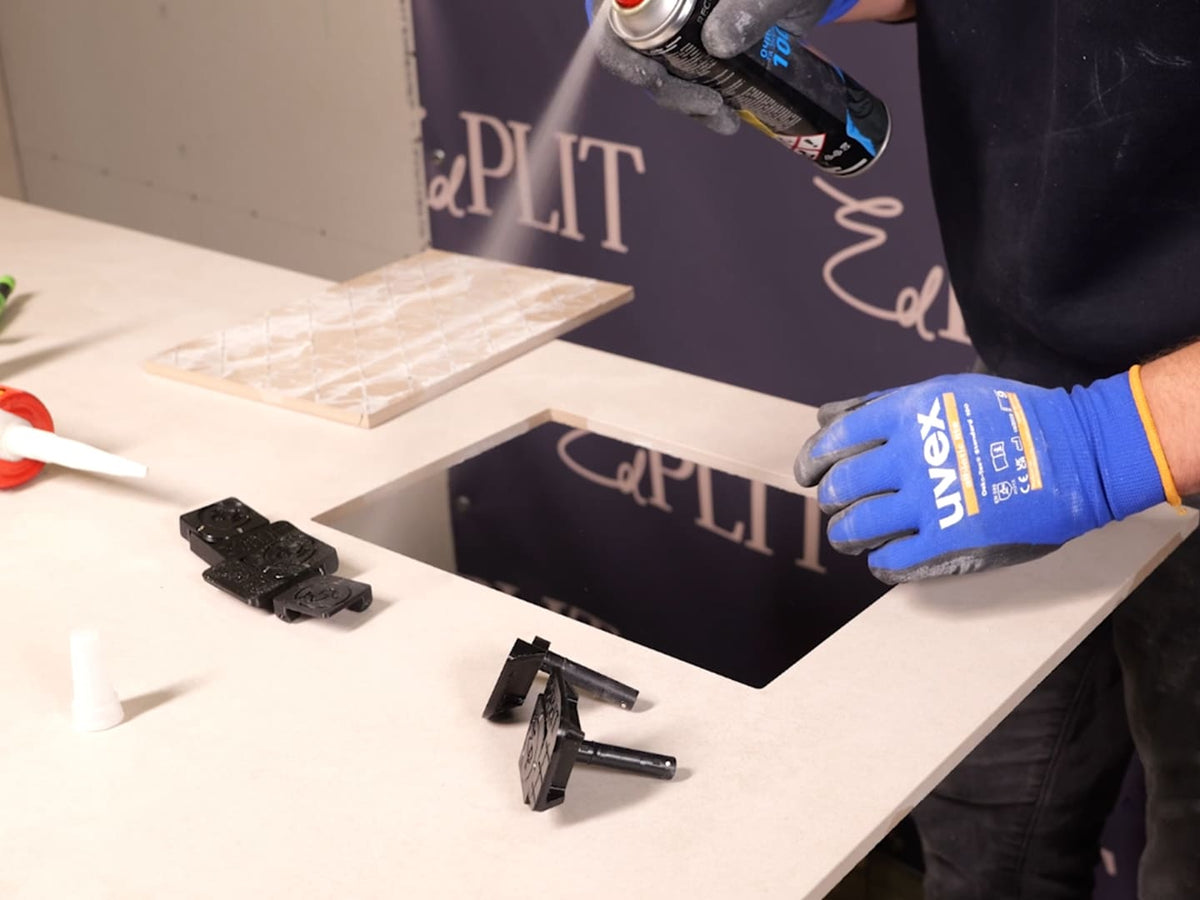
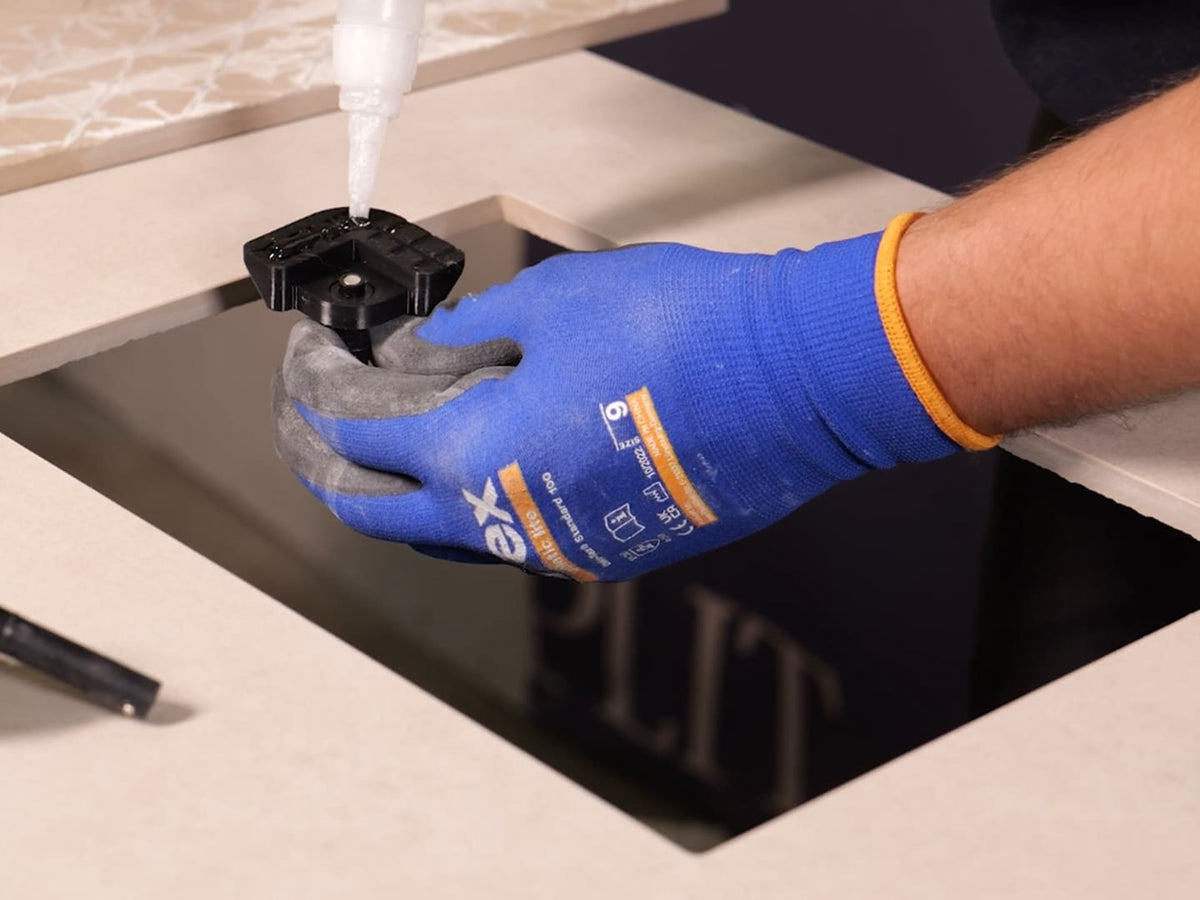
- Before you start the gluing process, degrease the surface.
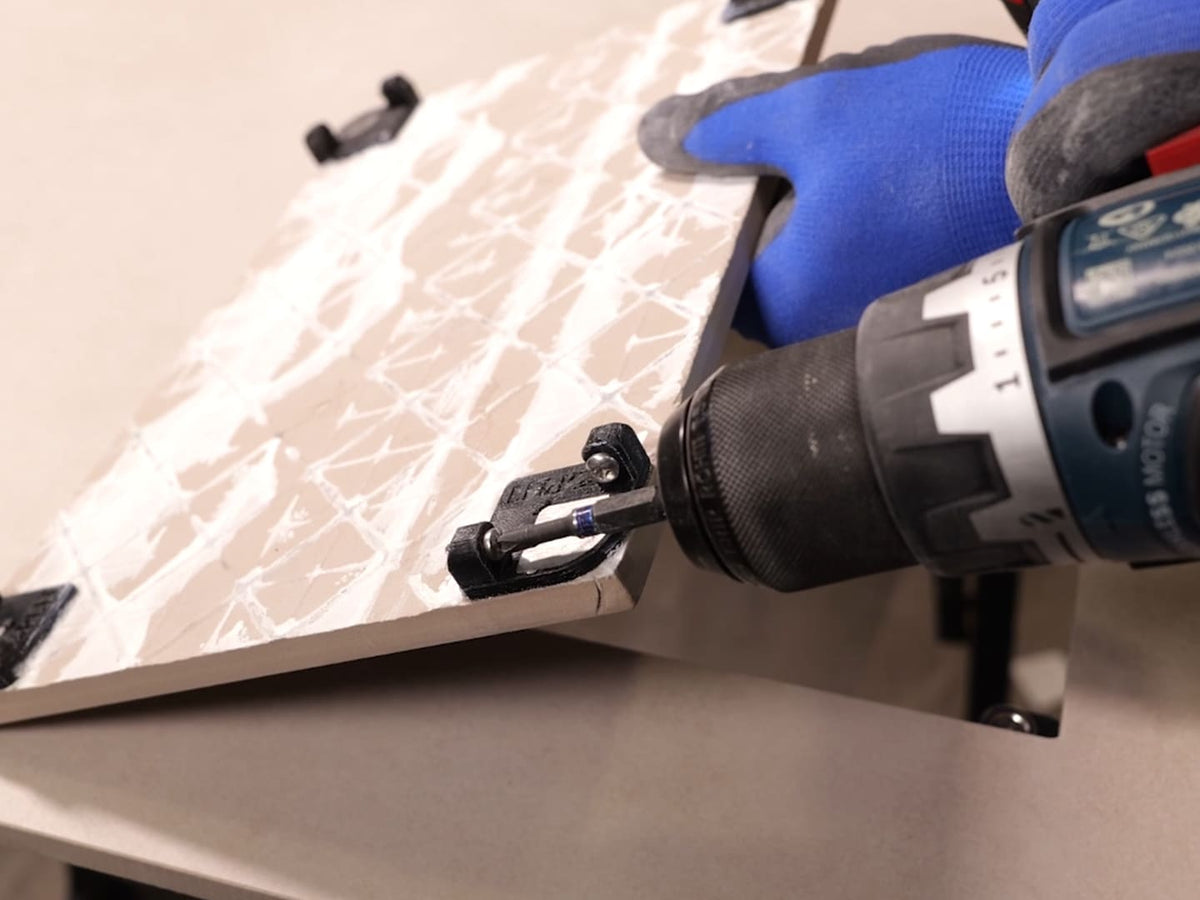
- In the upper zones, glue the pressing elements using adhesive for quick bonding.
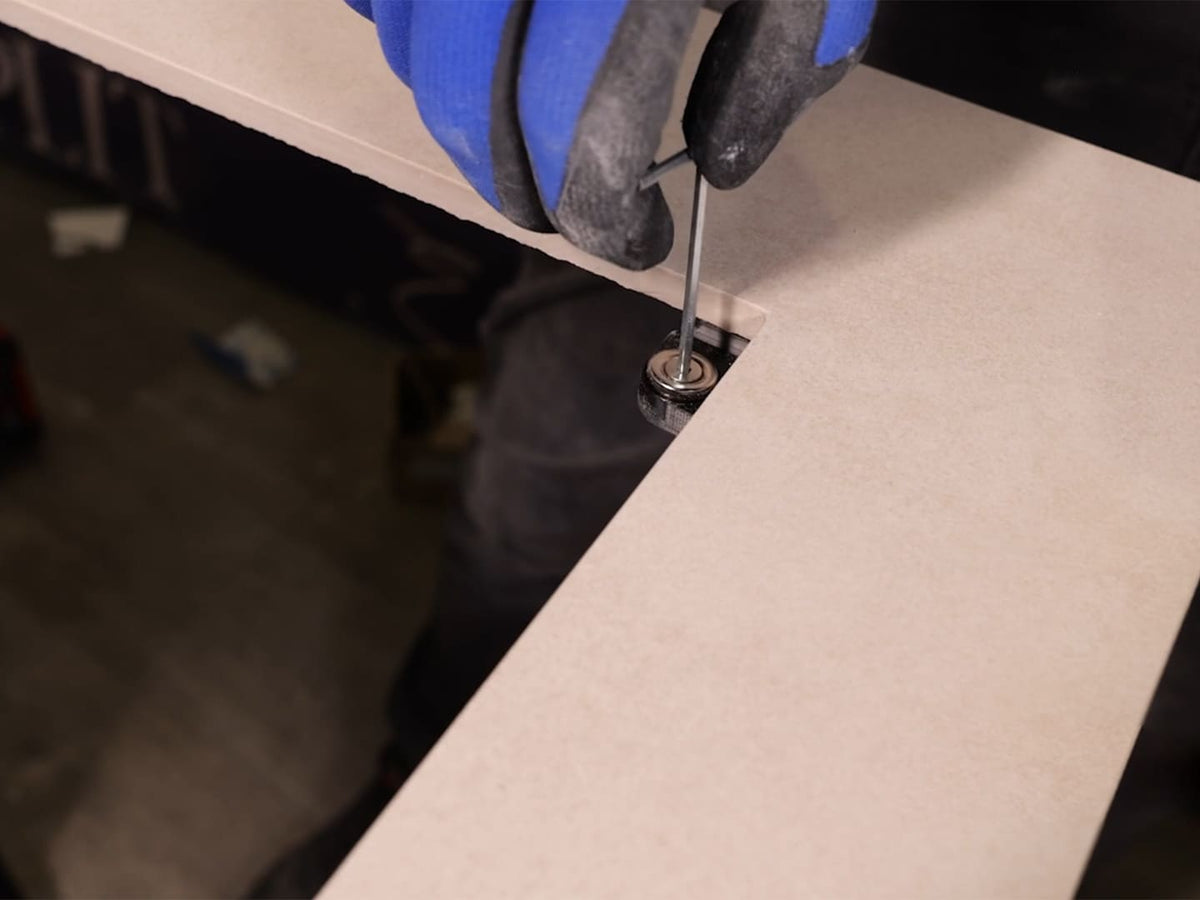
- After installing all the elements, position the hatch and adjust it so the gap is even around the entire perimeter.
- Use the adjustment screws for final alignment. They help regulate the position of the access hatch.
Take care during this stage, as proper alignment is essential for achieving an even perimeter gap and a flush finish.
5. Check the Finished Hatch
When the installation is complete, check that the hatch sits flush and evenly with the surrounding surface. Check the perimeter gap from different angles and make sure it is consistent. Finally, open and close the hatch several times to make sure the door operates correctly and that the tile does not interfere with its movement.

How to Hide a Plumbing Access Panel
The same tile-integration principle works for a plumbing access panel. When you hide an access panel behind tile, you still have direct access to:
- Shut-off valves
- Water meters
- Filters
- Manifolds
- Plumbing connections
- Other service points that may require inspection or maintenance.
There’s no need to leave a visible painted or metal door on the wall. The service hatch is finished with the same tile as the wall. It blends into the wall without limiting access for inspection and maintenance. In other words, you hide a plumbing access panel visually while the components behind it are easy to access when needed.

How to Hide an Access Panel in a Shower
When installing an access panel in a shower, the appearance is only one part of the installation. The panel must provide convenient access to the components behind the wall without compromising the waterproofing system.
As you decide where the wall opening should go, consider these factors:
- Access and opening. The panel should open comfortably while still providing sufficient service access.
- Materials and application. Both the panel and finishing tile should be suitable for the intended wet-area application.
- Mechanism. The mechanism should remain fully functional after installation.
-
Tile layout. Plan the tile layout around the panel before installation, including the position of the grout lines and the surrounding tile pattern.
A tileable access panel is not a substitute for proper waterproofing. A tiled access panel does not make a shower opening waterproof by itself. If the installation does not provide adequate protection, water may enter through gaps around the door. Choose an appropriate waterproofing system and follow the local requirements for your wet-area installation.

What to Consider Before Installing a Hidden Access Panel
Good planning is essential for a smooth installation. Before choosing and installing a hidden access panel, consider the following:
- Tile thickness and weight. The concealed hatch must be suitable for the thickness and weight of the tile you’ll use.
- Panel size and required opening. Choose a panel size that provides sufficient access to the components that may require inspection, maintenance, or repair. A larger service area may require a larger opening.
- Wall depth. Check that the wall has enough space for both the mechanism and the panel.
- Tile layout. Plan the panel together with the tile size, pattern, and grout lines rather than trying to fit it into a finished tile layout.
- Waterproofing. If the panel is installed in a bathroom, especially in a shower area, make sure it does not compromise the waterproofing system.

Common Mistakes When Hiding an Access Panel
Several common mistakes can make a hidden access panel more visible, difficult to use, or unsuitable for the application. Here are the main ones to avoid:
- Pick the wrong type of access panel. A traditional painted or metal hatch cannot provide the same visual integration as a panel designed to receive finishing tile. Browse hidden access panel ideas when you want the door to blend into a tiled surface.
- Ignore tile thickness. Tile makes the panel thicker and heavier. Choose the access hatch designed to accommodate the tile you plan to install.
- Fail to plan the panel before tiling. If you add the panel later, you’ll have to deal with misplaced grout lines, awkward cuts, or a disrupted tile pattern. Plan the panel from the start.
- Ignore tiles around the panel. Even a perfectly installed hatch can stand out if the surrounding grout lines do not align with the tile layout.
- Make the opening too small. Do not size the opening only for the components you need to access today. Consider future inspection, maintenance, and repairs as well. Choose a panel size that provides sufficient access. Edplit products are available in sizes up to 400 × 500 mm.
- You place the panel where the door cannot open fully. Check the area around the hatch before installation. A cabinet, wall, fixture, or other obstruction may prevent the door from opening fully.
- Ignore waterproofing requirements. A tileable panel is not waterproof on its own. In wet areas like a shower, install the panel without compromising the waterproofing system behind it.

Can You Tile Over an Access Panel?
Yes, but only if the access panel is designed to receive tile.
A typical access hatch comes with a visible painted or metal finish. If you simply add tile on top, you won’t get the same integrated appearance.
A tileable or tile-integrated access panel, in turn, is designed with the finishing tile in mind. The tile becomes part of the door and blends into the surrounding surface, while the panel remains removable for inspection and maintenance.
However, the installation still requires a clean cut, an even perimeter gap, and enough space for the door to open fully. If you want to hide an access panel behind tile, start with a panel designed for tiling.
 So, the goal is simple: keep all plumbing, electrical components, and other service points accessible without leaving an obvious hatch on the wall. To achieve this, choose a tile-integrated access panel, plan its position together with the tile layout, and make sure the tile is cut and installed accurately. Proper alignment, an even perimeter gap, and unobstructed door movement help the finished panel remain visually integrated while still providing reliable access for future inspection and maintenance.


